


Customizing photo booth wedding prints transforms ordinary snapshots into cherished, tangible keepsakes that guests carry home and display for years. A photo booth memory keepsake is defined as a physical printed image, branded with your wedding details, that guests receive on the spot. Physical prints enhance memory retention far more than digital files because haptic contact with an object reinforces recall. The role of photo booth keepsakes at weddings goes beyond novelty. They become the most talked-about wedding favour in the room, and the one guests actually keep.
What print formats should you choose to customize photo booth wedding prints?
Two standard formats define the photo booth print world: the classic 2×6 strip and the 4×6 postcard. Each serves a different purpose, and choosing the wrong one for your wedding style is the most common mistake couples make.
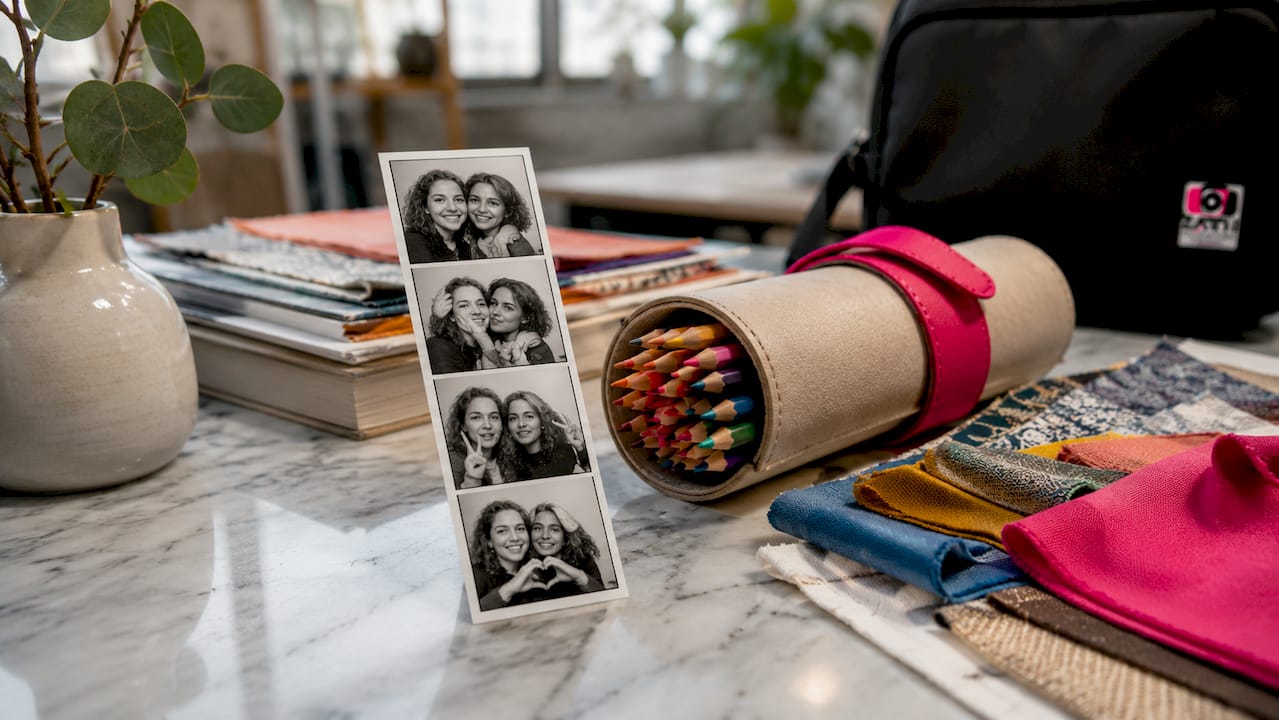
The 2×6 strip holds three or four stacked photos in a vertical layout. Its narrow shape feels nostalgic and social. Guests love tucking it into a wallet or sticking it on a fridge. The 4×6 postcard format gives you a single large image with generous white space around it. That extra space is ideal for a monogram, a floral graphic, or a full wedding hashtag displayed prominently.
| Feature | 2×6 classic strip | 4×6 postcard |
|---|---|---|
| Photo count | 3–4 images | 1–2 images |
| Best use | Social, nostalgic, wallet-friendly | Branded, display-worthy, frame-ready |
| Branding space | Narrow footer or header | Wide border or full overlay |
| Guest interaction | High, quick, fun | Moderate, more formal |
| Upgrade options | Metallic finish, keychain | Metallic finish, magnet |
Beyond the two main formats, premium upgrades include metallic finishes and keychain prints. A standard keychain print measures 1×3 inches and features a mini copy of the photo strip. Metallic paper adds a reflective sheen that makes colours pop, which works especially well for glam or black-tie weddings.
Pro Tip: If your wedding has a strong colour palette, choose the 4×6 postcard format. The wider border gives your designer more room to match your stationery without crowding the photos.
How do you design a custom overlay that matches your wedding theme?
A custom overlay is the graphic layer placed over your photos on the printed print. It carries your names, wedding date, hashtag, and any decorative elements that tie the print to your overall wedding aesthetic. Done well, it looks intentional. Done poorly, it looks like an afterthought.
The single most effective design principle for overlays is inverse contrast coordination. If your wedding invitations use dark text on a light background, flip that on your print overlay. Use light text on a dark footer or border. This creates visual contrast that makes the print feel polished and professionally designed rather than copied from your stationery.
Here are the core elements every well-designed overlay should include:
- Couple’s names: Use your first names or a combined monogram. Keep the font consistent with your invitation suite.
- Wedding date: Write it out in full (e.g., “June 14, 2026”) rather than using numerals. It reads more elegantly on a print.
- Wedding hashtag: Place it in a smaller font below the date. One hashtag is enough.
- Decorative graphic: One simple element, such as a floral sprig, a geometric border, or a line illustration, adds personality without clutter.
- Colour matching: Exact colour matching between your overlay and your stationery creates a cohesive visual identity across all wedding materials.
Font choice matters more than most couples realise. A serif font like Garamond or Playfair Display reads as classic and romantic. A clean sans-serif like Montserrat reads as modern and minimal. Mixing one of each, a display font for names and a clean font for the date, is a reliable approach that most professional designers use.
Pro Tip: Limit your overlay to three text elements maximum. More than three elements crowds the print and pulls attention away from the photos themselves.
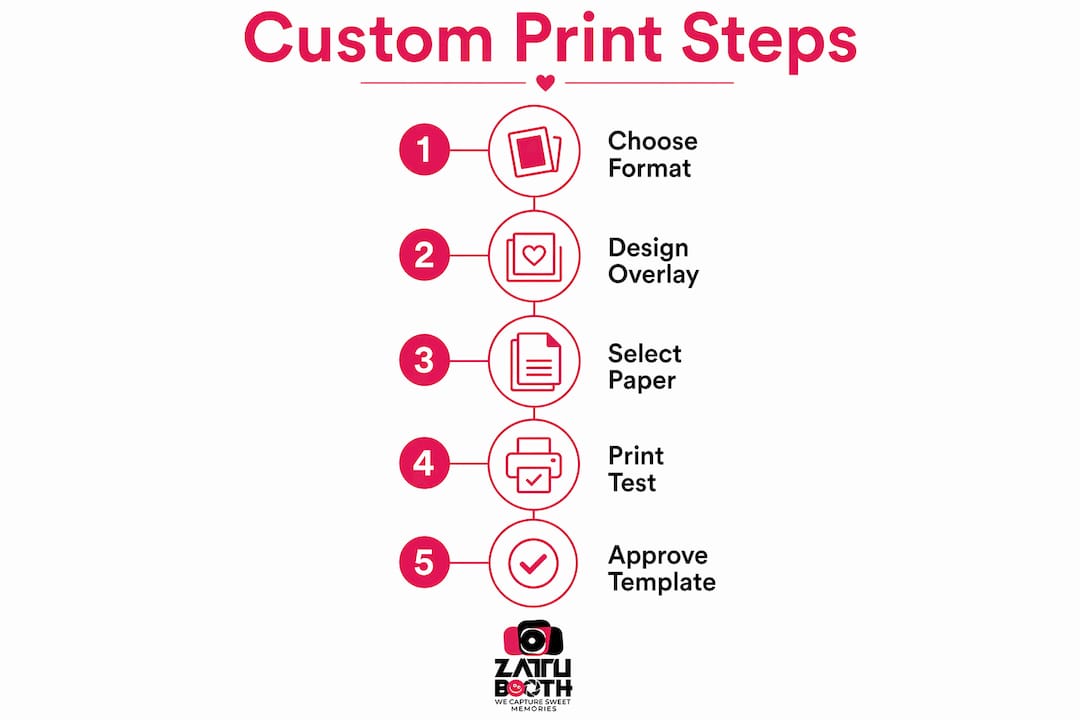
Steps to build and approve your print template before the wedding
Getting your template right before the event saves you from discovering problems on the night. Follow these steps to move from concept to approved print with confidence.
-
Choose your format and orientation first. Decide between 2×6 strip and 4×6 postcard before touching any design software. Orientation (portrait vs. landscape) affects every other design decision.
-
Gather your wedding stationery assets. Collect your invitation fonts, hex colour codes, and any graphic elements your stationer used. Your booth provider or designer needs these files to match your branding accurately.
-
Build or upload your overlay design. Many photo booth providers offer online design portals where you upload fonts and colour values directly. Professional design tools with exact font uploads produce far more consistent results than eyeballing colour matches on screen.
-
Request a printed proof, not just a digital preview. Colours shift between screen and paper. A printed proof on the actual paper stock your provider uses is the only reliable way to check contrast, legibility, and colour accuracy.
-
Check these four things on your proof:
| Check | What to look for |
|---|---|
| Text legibility | All text readable at arm’s length |
| Colour accuracy | Matches your stationery within one shade |
| Spacing | No text touching photo edges |
| Branding balance | No element dominates the photo itself |
- Approve and lock the template at least two weeks before your wedding. Last-minute changes risk print errors on the day. Your booth operator needs time to load the final file and test it on their equipment.
Pro Tip: Ask your booth provider to print a test strip on the actual event paper stock before your wedding day. A five-minute test print prevents hours of disappointment.
How do custom prints improve guest experience at your wedding?
Physical prints boost guest engagement by 60–80% compared to digital-only photo experiences. Guests who know a tangible print is waiting for them are more enthusiastic, more likely to visit the booth multiple times, and more likely to bring other guests along.
The most effective way to amplify that engagement is a guestbook scrapbooking station. Guests paste their prints into a shared album and write personal messages beside their photos. The result is a collective memory artefact that couples treasure far more than a standard guestbook. It combines the warmth of handwritten notes with the visual impact of real photos.
Physical prints are the real guest takeaway from any photo booth experience. The digital file gets buried in a camera roll within days. The printed strip stays on the fridge, the desk, or the mirror for years. That staying power is what makes the print the most valuable output of any wedding photo booth.
Booth placement also drives participation. High-traffic placement near the bar, the dance floor entrance, or the cocktail hour space generates natural foot traffic and social energy. Placing the booth in a back corner kills participation regardless of how beautiful the prints are.
Additional print upgrades that guests genuinely love include:
- Magnet prints: Guests stick them on the fridge the same night. High visibility, long lifespan.
- Keychain prints: The 1×3-inch mini strip format fits in a pocket and doubles as a functional keepsake.
- Metallic finish prints: The reflective surface photographs well and feels premium in hand.
The lasting value of a physical keepsake comes from its haptic quality. Holding something triggers a different kind of memory than scrolling past a digital image. Couples who invest in well-designed, high-quality prints consistently report that guests mention the photo booth as one of their favourite parts of the wedding, often months later.
Key takeaways
Personalised photo booth wedding prints require the right format, a cohesive overlay design, and a tested template to become lasting keepsakes guests genuinely treasure.
| Point | Details |
|---|---|
| Format choice matters | Choose 2×6 strips for social fun or 4×6 postcards for branded, display-worthy prints. |
| Overlay design drives cohesion | Match fonts and colours to your stationery using inverse contrast for maximum legibility. |
| Proof before the event | Always request a printed proof on actual paper stock at least two weeks before your wedding. |
| Guestbook stations multiply value | Scrapbooking stations turn individual prints into a shared keepsake couples keep for life. |
| Placement drives participation | Position your booth in high-traffic areas to increase guest engagement and print usage. |
What I’ve learned about prints after years in the booth
The couples who get the most out of their photo booth are the ones who treat the print as part of their wedding design, not as a bonus feature. I’ve seen beautifully decorated receptions where the photo booth print looked like it came from a different event entirely. Mismatched fonts, generic borders, a date in the wrong colour. It pulls guests out of the experience.
The fix is simple but requires intention. Bring your stationer’s files to your booth consultation. Share your hex codes. Ask to see a printed proof, not a screen preview. When the print matches the invitation, the place card, and the centrepiece, guests notice. They may not say “the overlay matches the stationery,” but they feel that the event is cohesive and considered.
The other thing I’d push back on is the idea that digital sharing replaces physical prints. It doesn’t. Digital sharing has real value for reach and social moments, but the print is what guests remember. I’ve watched guests at weddings spend ten minutes at the scrapbooking station writing notes beside their strips. That moment of connection, pen in hand, photo in front of them, is something no Instagram story replicates.
Invest in the print. Get the proof. Place the booth where people actually are. The rest takes care of itself.
— George ZATTU
ZATTU PHOTO BOOTH wedding print packages worth knowing about
At ZATTU PHOTO BOOTH, we build every wedding print template from scratch to match your stationery, colour palette, and wedding style. You choose the format, we handle the design, the proof, and the final print quality check before your event.
Our wedding photo booth packages include guestbook scrapbooking stations, premium paper stock options, and metallic finish upgrades. Every booking comes with a personalized consultation so your prints feel like a natural part of your wedding design, not an add-on. Couples across Southwestern Ontario trust us to deliver frame-worthy keepsakes that guests talk about long after the last dance. Ready to see what your prints could look like? Request a quote and we’ll walk you through every option.
FAQ
What is a photo booth memory keepsake?
A photo booth memory keepsake is a physical printed image from a wedding or event, branded with the couple’s names, date, and design elements. Guests receive it on the spot and keep it as a lasting souvenir.
What is the best print format for a wedding photo booth?
The 2×6 classic strip suits social, high-energy weddings where guests want a quick, fun takeaway. The 4×6 postcard works better for formal or branded weddings where display quality and design space matter more.
How do I customize photo booth wedding prints to match my theme?
Match your overlay fonts and colours exactly to your wedding stationery, use inverse contrast for text legibility, and limit your overlay to three text elements: names, date, and hashtag.
Why do physical photo booth prints matter more than digital sharing?
Physical prints trigger haptic memory, meaning guests retain and recall the experience more strongly when they hold something tangible. Digital files get lost in camera rolls; printed strips stay visible on fridges and desks for years.
How early should I approve my photo booth print template?
Approve your final template at least two weeks before your wedding. This gives your booth provider time to load the file, run test prints on the actual paper stock, and resolve any colour or spacing issues before the event.